Tuesday, February 28, 2012

February Colors of the Month: Mostly Pink with Red, Green and Blue too!

We celebrated Valentine's with our friends a little bit late this year due to winter cold bugs (Come on Spring...get here already!), so my color of the month post is coming a bit late as well since I wanted to incorporate images from our Valentine's Party preparations too!

(Ironically, we'll be hosting a Halloween party on Saturday.  We had planned to hold a make up Halloween party in January after the holidays, but then something came up, so it got pushed back further to this weekend.  Seriously, who holds a Valentine's party and a Halloween party in the same week?  We do.  That's right.  I can't wait to get more use out of our costumes!)

Here's how our great room is looking for one last day:


The fabric 'love' canvas was originally posted about here.


My Christmas card display canvas got some more use!


Valentine's Day Party Crafts and Decor:
We used Fimo clay a la Oh Happy Day to create mini hearts.


And we attached some to our Valentine's.


We left some extras for bracelets and necklaces.


We also painted wooden craft hearts...


...and attached them to small wooden clothespins.


I added them to our boxwood wreath that is still holding strong on our front door from Christmas.


They were also attached to our branch tree now that the icicles have been taken down.


I also made a door hanger.  It came with the twine already attached, so I just painted it.  Easy Peasy Pie.


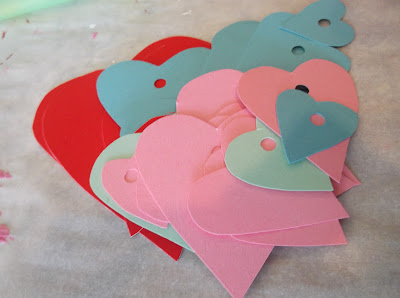
 Finally, we used some card stock that I cut into various sizes of hearts...


...and made some adjustments to our dining room light fixture:


 I just like this picture:


 A Valentine's Party wouldn't be fun without a few snacks and some sweet treats:


I cannot take credit for the beauty nor sugar content of these cupcakes.  That was all Lucky.  And Charm.


And with this post, I've completed a full year of 'Color of the Month' posts.  While it has been a fun challenge and good learning experience, I won't be continuing the tradition.  Instead, I'll be focusing on making more permanent decorating decisions for our great room.  Sure, we'll make some holiday changes, but the room won't be changed out every month.  I hope you have enjoyed the series!!  And don't worry, this isn't the last time you'll see our great room:)!

Monday, February 27, 2012

Hopscotch, Anyone?

First of all, I must say thanks for all the kind words and pins on Pinterest this weekend!  I have this feeling there will be more gutter shelves going up in kids rooms and playrooms!  If you've found my blog through Pinterest, welcome!!

Here is another project that I completed a couple months ago, but I haven't posted about until now.  Several months ago I posted about the one dollhouse room that we have completed so far (more rooms have been planned, and Lucky and I are excited about finding some time to work on it!!):


I have incorporated two pieces of this pretend room into our real life home decor.  I already showed you that the sunburst mirror was a mini red replica of the mirror I made for our guest room:


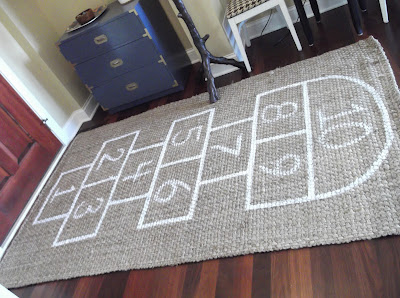
And now, meet our new foyer rug:


It's just a simple jute rug like this one that I painted using a combination of flat white paint and fabric medium.


Here is my plan:


I first used painter's tape to mark where I wanted my hopscotch lines to be.  Then I surrounded that tape with additional painter's tape.  I pulled off my original hopscotch tape lines and painted in that area.  These images help to illustrate the concept:


I thought about stenciling in the numbers, but it would have taken me a while to print out numbers on the ol' computer and mark them with a Sharpie and then paint them.  Because it was nearing dinner time, I took a risk and free handed them.  I think they turned out just fine!  

The rug may get moved to our mudroom at times, but for now, I love greeting people with such a kid friendly rug!  And it's keeping the kids busy in the winter time in an area where I can keep an eye on them.  I had picked up a couple hopscotch markers from Joann's in the $1 section, except they were 50% off making them 50 cents each.  They were bright pink, orange and purple.  The instant gratification of being able to use something as is was nice, but the colors wore on me.  I just recovered the gravel filled markers with scrap fabric that I sewed into pouches:


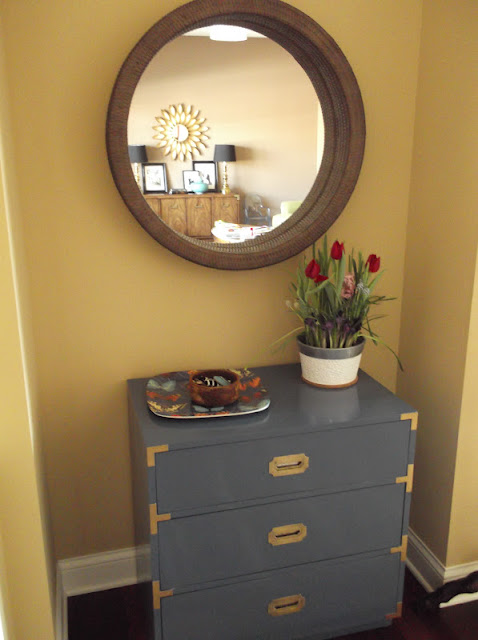
They live in a little bowl on my campaign chest in the foyer.


In this image, you can see some chairs I painted and recovered last fall during our big furniture refinishing frenzy.  You will be seeing more of the houndstooth fabric that I picked up for $2.70/yard last fall.

These chairs were an orange wood color originally.  They were $4.99 each at Goodwill.  Including supplies and the chair cost, it was less than $20 total for both chairs.


My next area of focus in the entry area will be this little nook:
I plan to add some sort of wall treatment, a different mirror, and maybe some wall hooks too.


I love this chest!  

This bulb bouquet was my Valentine's present from Bill, and it has been so much fun to watch it change and bloom.  We have a new flower surprise almost every morning!!  In the spring, we'll plant the bulbs outside, too.  I used to tell Bill not to buy me flowers because they can be so expensive, but I'll take living flowers like this any day!!  Thanks dear.

I have no idea how or why I started talking about flowers during a rug post.  But that's all I've got for today!  I hope you all had a wonderful weekend!  

Linking up to Finding Fabulous.
Linking up to The Shabby Nest.
Linking up to Thrifty Decor Chick.
Linking up to The Rooster and The Hen.

Friday, February 24, 2012

Charm's New Shelves

Wall Paint Color: SW 6109 Hopsack


Well, they are sort of new:).  We actually installed them in November, but I never wrote about them until now.  I can safely say after 4 months of use that we all love them!  While we considered making the shelves out of wood, we were worried about the sharp corners and hard wood causing injury.  Also wood shelves drilled into studs would easily turn into a fireman's ladder in the mind of a 2 year old, and that wouldn't be good.  Vinyl gutters helped to achieve our goal of creating bookshelves and a reading corner without introducing elements of danger (The gutters are secure enough to hold books, but would bend under the weight of Charm and prevent climbing.  Also the ends are capped so there aren't any sharp edges.)

As for cost, wood would have been cheaper without a doubt.  The straight lengths of gutter were only $5 for a 10 foot length.  Since each shelf was 36" per side x 2 sides x 4 shelves, we needed three 10 foot sections of gutter.  That was the cheap part.  Each end cap was $3 and we needed 8, and each corner piece was $6 and we needed 4.  Our total was $60 using a 10% off coupon.  We didn't need to paint though! Bill just used a hacksaw at home to make our cuts and we screwed them into the studs and at the end of each shelf.  They are safe and secure (and cute and practical!).

And in case you're interested, we first taped the proposed location of the shelves on the wall so we could get a feel for the length and spacing of the shelves.  We ended up spacing the shelves 14 inches apart from the top of one shelf to the top of the next shelf.


Has anyone else jumped on the gutter bookshelf bandwagon?

Have a super weekend!

Linking up to Finding Fabulous
Linking up to The Shabby Nest.
Linking up to Thrifty Decor Chick.

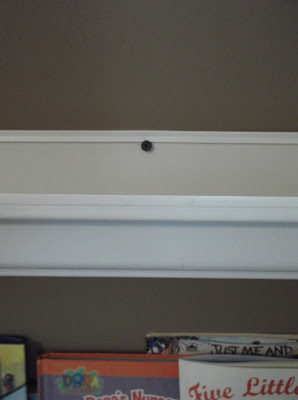
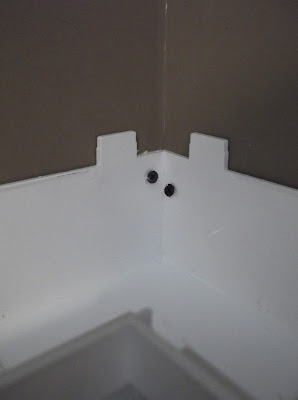
4/23/2012 Update:  Here are some images of the drywall screws that we used to attach the bookshelves.  We used 1.5" drywall screws placed at a slight angle into studs in the corner of the shelves and in the middle of each shelf.  We also put one screw into each end piece (not in the stud) when Command Hooks failed to hold the shelves flat to the wall on the end.  We didn't use any anchors or special screws.  We just drilled in just under the top lip of the gutter.  Please comment or email with any additional questions.  I'm happy to help!!


End cap screw into drywall.  You could use an anchor here, but we didn't.

Center screw into stud.

Corner screws.  One on each wall through the stud.


11/30/12 Update: WALL PAINT COLOR INFORMATION: Sherwin Williams 6109 Hopsack.  I finally found the paint can that corresponds to this room!!  (The wall color was inherited from our home's previous owners.)

Wednesday, February 22, 2012

New Artwork for Charm!

While I loved this picture hanging on Charm's wall for the last 8 months or so (it was the original inspiration for the vintage modern feel of his room), it started to feel a little too 'nursery' for my 'big boy's' room:).


So I found inspiration on page 357 of my signed copy of Grace Bonney's, Design Sponge.  (A Christmas gift from my parents.  Thank you, Oma and Opa!).


I didn't have nor need a dresser for the space, but I did have an extra canvas hanging around (It was being used as a temporary headboard for Charm's toddler bed).  I used a salad plate to recreate the wave pattern on the canvas with a pencil:


Next, I gathered up a few blue paints, along with white and black paints so I could alter the colors to get a nice gradient pattern.


 Progress:


Project Complete!:


Charm calls his mushroom jars, bongos and plays them accordingly.  I was inspired by these acrylic jars at pottery barn kids, but even on sale for $20, it is a steep price to pay for a plastic jar, in my opinion.  So when I spied some red lidded plastic jars in the Target bulk snack food aisle late last fall, I scooped up a pretzel jar and a frosted cookie jar.  When we were finished snacking on the food, I washed the jars out and removed the labels.  Next, I filled the jars with faux moss rocks that I picked up at the dollar store last fall, as well.  Finally, while I planned to make my own mushrooms, I got lucky when Target offered felted wool mushroom ornaments.  I waited until they went on sale the day after Christmas and scooped up three of them.  They were $1.50 each.


They didn't have any red mushrooms left, however, so I used some felt and turned a blue mushroom into a red mushroom.  The white dots are just white felt.  I used little pieces of velcro on the bottoms of both the jars and the mushrooms to help them stand up, though they are a bit top heavy.


Finally, I modge podged a big letter 'H' that I picked up at Joann's with a 50% off coupon ($5) using our Sunday newspaper.

I love the look of this side of Charm's Room.  And actually, I am within eyesight of the finish line for Charm's Room.  More Charm's Room posts to come soon!!

Linking up to Finding Fabulous.
Linking up to The Shabby Nest.
Linking up to Thrifty Decor Chick.