Showing posts with label Paint Project. Show all posts

Monday, February 27, 2012

Hopscotch, Anyone?

First of all, I must say thanks for all the kind words and pins on Pinterest this weekend!  I have this feeling there will be more gutter shelves going up in kids rooms and playrooms!  If you've found my blog through Pinterest, welcome!!

Here is another project that I completed a couple months ago, but I haven't posted about until now.  Several months ago I posted about the one dollhouse room that we have completed so far (more rooms have been planned, and Lucky and I are excited about finding some time to work on it!!):


I have incorporated two pieces of this pretend room into our real life home decor.  I already showed you that the sunburst mirror was a mini red replica of the mirror I made for our guest room:


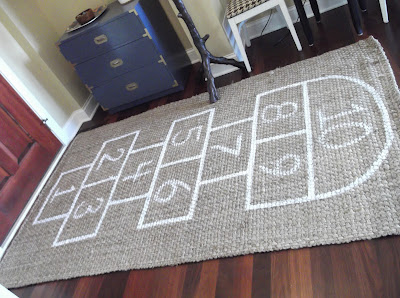
And now, meet our new foyer rug:


It's just a simple jute rug like this one that I painted using a combination of flat white paint and fabric medium.


Here is my plan:


I first used painter's tape to mark where I wanted my hopscotch lines to be.  Then I surrounded that tape with additional painter's tape.  I pulled off my original hopscotch tape lines and painted in that area.  These images help to illustrate the concept:


I thought about stenciling in the numbers, but it would have taken me a while to print out numbers on the ol' computer and mark them with a Sharpie and then paint them.  Because it was nearing dinner time, I took a risk and free handed them.  I think they turned out just fine!  

The rug may get moved to our mudroom at times, but for now, I love greeting people with such a kid friendly rug!  And it's keeping the kids busy in the winter time in an area where I can keep an eye on them.  I had picked up a couple hopscotch markers from Joann's in the $1 section, except they were 50% off making them 50 cents each.  They were bright pink, orange and purple.  The instant gratification of being able to use something as is was nice, but the colors wore on me.  I just recovered the gravel filled markers with scrap fabric that I sewed into pouches:


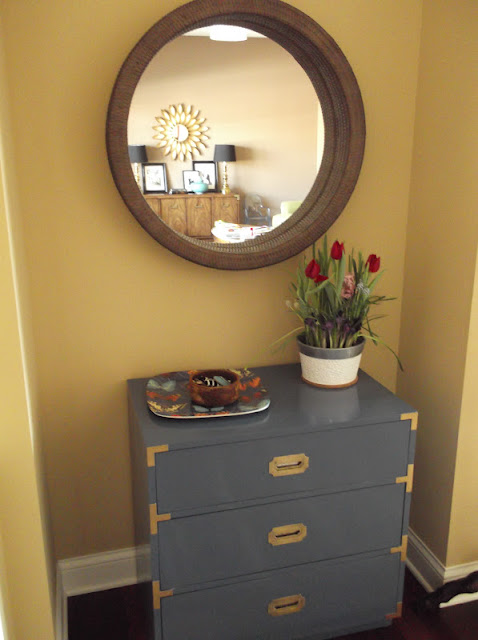
They live in a little bowl on my campaign chest in the foyer.


In this image, you can see some chairs I painted and recovered last fall during our big furniture refinishing frenzy.  You will be seeing more of the houndstooth fabric that I picked up for $2.70/yard last fall.

These chairs were an orange wood color originally.  They were $4.99 each at Goodwill.  Including supplies and the chair cost, it was less than $20 total for both chairs.


My next area of focus in the entry area will be this little nook:
I plan to add some sort of wall treatment, a different mirror, and maybe some wall hooks too.


I love this chest!  

This bulb bouquet was my Valentine's present from Bill, and it has been so much fun to watch it change and bloom.  We have a new flower surprise almost every morning!!  In the spring, we'll plant the bulbs outside, too.  I used to tell Bill not to buy me flowers because they can be so expensive, but I'll take living flowers like this any day!!  Thanks dear.

I have no idea how or why I started talking about flowers during a rug post.  But that's all I've got for today!  I hope you all had a wonderful weekend!  

Linking up to Finding Fabulous.
Linking up to The Shabby Nest.
Linking up to Thrifty Decor Chick.
Linking up to The Rooster and The Hen.

Wednesday, February 22, 2012

New Artwork for Charm!

While I loved this picture hanging on Charm's wall for the last 8 months or so (it was the original inspiration for the vintage modern feel of his room), it started to feel a little too 'nursery' for my 'big boy's' room:).


So I found inspiration on page 357 of my signed copy of Grace Bonney's, Design Sponge.  (A Christmas gift from my parents.  Thank you, Oma and Opa!).


I didn't have nor need a dresser for the space, but I did have an extra canvas hanging around (It was being used as a temporary headboard for Charm's toddler bed).  I used a salad plate to recreate the wave pattern on the canvas with a pencil:


Next, I gathered up a few blue paints, along with white and black paints so I could alter the colors to get a nice gradient pattern.


 Progress:


Project Complete!:


Charm calls his mushroom jars, bongos and plays them accordingly.  I was inspired by these acrylic jars at pottery barn kids, but even on sale for $20, it is a steep price to pay for a plastic jar, in my opinion.  So when I spied some red lidded plastic jars in the Target bulk snack food aisle late last fall, I scooped up a pretzel jar and a frosted cookie jar.  When we were finished snacking on the food, I washed the jars out and removed the labels.  Next, I filled the jars with faux moss rocks that I picked up at the dollar store last fall, as well.  Finally, while I planned to make my own mushrooms, I got lucky when Target offered felted wool mushroom ornaments.  I waited until they went on sale the day after Christmas and scooped up three of them.  They were $1.50 each.


They didn't have any red mushrooms left, however, so I used some felt and turned a blue mushroom into a red mushroom.  The white dots are just white felt.  I used little pieces of velcro on the bottoms of both the jars and the mushrooms to help them stand up, though they are a bit top heavy.


Finally, I modge podged a big letter 'H' that I picked up at Joann's with a 50% off coupon ($5) using our Sunday newspaper.

I love the look of this side of Charm's Room.  And actually, I am within eyesight of the finish line for Charm's Room.  More Charm's Room posts to come soon!!

Linking up to Finding Fabulous.
Linking up to The Shabby Nest.
Linking up to Thrifty Decor Chick.

Wednesday, December 21, 2011

Seeing Chevron

Way back in April, when I first posted about our dining room, I had mentioned wanting to add a touch of chevron in the form of either curtain panels or a large dining room suitable rug.  For now, I decided to go the chevron curtain route since we already owned a set of plain white Ritva panels from IKEA that would make the perfect blank canvas for a little chevron painting fun.

Here are our supplies:

I color matched a beautiful rich, deep chocolate brown paint color (I have since misplaced the paint chip so I'm not sure of the exact color...sorry!) to a flat 'One by Olympic' gallon of paint that we picked up on sale at Lowe's.  We also used textile medium in our paint (1:2 ratio of medium to paint) to make the paint more flexible when dry.  The curtain would be washable if I heat set the paint/textile medium combo with an iron, although I'm not sure I'd trust it in my washing machine:).  

In the future, I'd love to do a mini test to see how much impact the textile medium has on fabric flexibility and prevention of cracking, although the medium was not that expensive.  I used about 1 1/2 bottles of textile medium, and I stuck closely to the 1:2 ratio (medium to paint) recommended by the manufacturer.  Full price the bottles are $7.99 each at Joann's (located by the acrylic paints), but I used coupons on both bottles making the total for 2 bottles around $9.

When I first added the textile medium to the paint, I was worried that it would affect the color of my paint because the medium is a thick, white product, but my dark, brown paint color was not changed with the addition of textile medium.  I mixed the paint and medium together in a blue plastic cup:

We save our Red Solo cups for other things:).

And then I poured the paint into a paint tray within a cardboard box (to be safe since I was painting on the floor in our great room):


As for decisions on the size of the chevron stripes we wanted to make, I looked to this tutorial from the blog A Drop in the Bucket:


Shalynn used this spacing to create her bold chevron stripes (painted on a huge $20 drop cloth...brilliant!)


For our purposes, I decided that the 6 inch stripes would be a bit too thick for our space, so we decided on 4 inch stripes but kept the 12 inch spacing between peaks in place.  (In retrospect, I wish I would have drawn out our proposed spacing on a big piece of poster board so I could get the feeling of the stripe size.  I think I would have landed on an even smaller stripe size...like 3 inches or maybe even 2 inches.  Next time:).)

My amazing husband marked and taped out the curtain panels for me:

We just used the tape we had on hand, although it was much easier to paint when 2 pieces of 2" tape were placed side by side to create the four inch 'white' sections of the chevron pattern because there were no gaps, thus no opportunites for a roller to sneak over a tape line into the wrong section.

After taping, Bill needed a break so he laid down for a minute in Charm's room.  The kids created a colorful Daddy mountain while he rested his back and knees:

That's Bill under the pile of rugs, blankets, pillows and stuffed animals.


.,
His left hand is under this carefully placed pile of feathers.


The Daddy emerges...and a 30 minute feather pickup ensues.


And now back to the curtains.  Here is the second panel that was taped using 2 inch painter's tape:  


Painting it was super easy, since I didn't have to think about what parts needed to stay white versus being painted.  Any exposed part of the curtain got painted.


Here is the same curtain panel after I applied a second coat of paint:
I painted 3 or 4 stripes at a time and then removed the tape around those stripes to give me the best chance of having clean lines.  It worked well!!  Here are some more pictures:


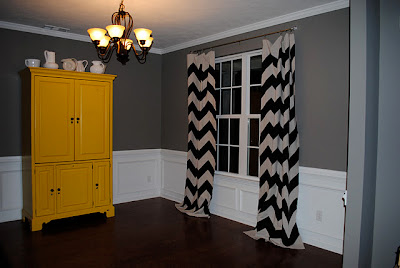
And for a little fun, here's our dining room last year:


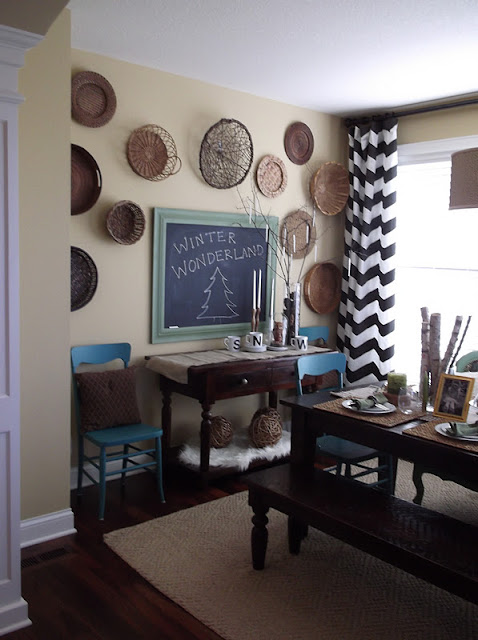
Add a basket wall, a chalkboard menu, wall art, a homemade curtain rod, a new dining bench (and table), new to us dining room chairs, a settee and now chevron curtains.  Then takeaway 2 booster seats, and here is our dining room now:


It's amazing what a difference a year makes!  Is anyone else chevron happy?  

Don't forget to enter my Christmas Starbucks Giftcard Giveaway if you haven't done so already...your odds are really good for this one:)!

Linking up to The Shabby Nest.

Home Stories A2Z

Linking up to Passionately Perfect.
Linking up to Thrifty Decor Chick.

Monday, November 14, 2011

Just in Time for Winter: Sun Porch Additions

One of the paint projects we tackled during our paint-athon, was painting this dry sink that had been giving to me by my mother.  I used Glidden's Truly Olive on the piece.  (It's the same paint I used on our DIY dining room chalkboard.).

Here is the before:

It's the best before I have thanks to...you guessed it...the camera card tragedy of 2011.  Just note the hardware and the water damaged top (left front).  The water damage occurred after the branches I used in my Halloween display dropped a few leaves onto the dry sink while they were being stored in the garage last fall.  The leaves sat and sat and started to destroy the top of the dry sink.  Staining the piece was not an option because the wood had large cracks in it and the water damage was deep in the surface of the wood.  I would have loved to stain the piece with a dark espresso stain, but instead chose a green color that we had on hand already and that seemed to work with the floral rug we have in the room as well.


Here is the after:


I updated the hardware using fairly simple oil rubbed bronze pulls from Menards.  They cost about $3 each.  I used a couple coats of Minwax polyacrylic finish in satin to protect the top.  The changes definitely updated the look of the piece and most importantly covered the water stained and cracked top of the unit.

Since we had the polyacrylic and paint on hand already, the dry sink update cost about $15 for new pulls.  Not too bad!  The picture frame resting on top of the unit is an IKEA Ribba frame that we had up at our old house.  I had a recent 16 inch x 20 inch picture printed at Sam's Club for $5.96.  I absolutely love that picture!!


I also picked up some of these string lights from Target on clearance (of course) for $6.48 per package.


And here's the infamous clock that I posted about here:


Bill and I were planning on getting the clock and lights up this year, but time has slipped away and you know what, it's cold out!!  Our sun porch is a three seasons room, so it will turn into a huge walk in refrigerator/freezer in the very near future.  Rather than rush to hang up a clock and lights for a pretty blog picture, we're going to wait until the spring to hang them...you know, when we'll actually be able to enjoy them!

This room has come a long way already.  As a reminder, here was the way the room looked this past May:


And some more recent shots:


With the lights and clock in place next spring, we may never leave our sun porch next spring:).  Or if we do leave, at least we'll know what time it is:)!