Showing posts with label Craft. Show all posts

Sunday, April 8, 2012

Happy Easter!

We hope you have a wonderful Easter Sunday spent with family and friends and lots of jelly beans!


And since I never posted about a few Easter projects we worked on over the last couple weeks...here they are all at once:

We made an egg garland using the tutorial from Modern Parents Messy Kids and paint chips:


Instead of punching holes in the eggs to string the garland, I just grabbed a big needle and sewed them together:)!


We planted some wheat grass seeds and watched it sprout super fast!


We gave the new product Eco-Eggs a try:)!  They are big and wonderful and eco-friendly!


 We had fun with sprinkles and frosting:


And made these carrot cookies (and a couple huge bunnies too):

We made pirate eggs:


And today, we'll be doing a little basket hunting and we'll spend some time at Easter mass!
Happy Easter!

Monday, March 19, 2012

Ice Markers!

Has anyone seen the creative ways people are recycling old crayons?


Lucky and Charm each received a heart shaped crayon from classmates for Valentine's Day this year. They were made by melting together pieces of old crayons.  How clever is that?  I'm keeping my eye out for shallow cookie pans with fun shapes so that we can duplicate that project.

Related to recycling crayons, but on the marker front, our music teacher brought 'ice markers' to class last month and our kids loved creating art with them.  We decided to try this activity at home, so we rounded up our old markers and prepared them for a Valentine's craft by filling a $1 store plastic ice tray (they come in two packs) with water.  We placed our old markers in the tray and let the water suck out the ink.  We let them sit and mixed them up every 5 minutes or so.  After about 15 minutes we stuck them in the freezer.


Once they froze, they were ready to go:


The kids love them (making them was half the fun!), and it's a great way to get one more use out of old markers!  Let me know if you give this a try!

P.S. Please no peanut gallery comments about the posting of a 'Valentine Craft' after St. Patrick's Day.  Clearly, we are challenged in the holiday order department around here.  Also, I was too busy enjoying the nice weather this weekend (80 degrees for St. Patrick's Day!!), eating green pancakes and drinking green milk shakes (and green beer:)), and reading this little book called The Hunger Games (COULD NOT PUT IT DOWN!) to write up a fresh post.  Those are my reasons why this post in the middle of March is about Valentine's Day.  Really, it's about hearts.  Hearts are year round shapes, so maybe I'm good after all!

Regardless, I hope you all had a splendid weekend!

Wednesday, February 22, 2012

New Artwork for Charm!

While I loved this picture hanging on Charm's wall for the last 8 months or so (it was the original inspiration for the vintage modern feel of his room), it started to feel a little too 'nursery' for my 'big boy's' room:).


So I found inspiration on page 357 of my signed copy of Grace Bonney's, Design Sponge.  (A Christmas gift from my parents.  Thank you, Oma and Opa!).


I didn't have nor need a dresser for the space, but I did have an extra canvas hanging around (It was being used as a temporary headboard for Charm's toddler bed).  I used a salad plate to recreate the wave pattern on the canvas with a pencil:


Next, I gathered up a few blue paints, along with white and black paints so I could alter the colors to get a nice gradient pattern.


 Progress:


Project Complete!:


Charm calls his mushroom jars, bongos and plays them accordingly.  I was inspired by these acrylic jars at pottery barn kids, but even on sale for $20, it is a steep price to pay for a plastic jar, in my opinion.  So when I spied some red lidded plastic jars in the Target bulk snack food aisle late last fall, I scooped up a pretzel jar and a frosted cookie jar.  When we were finished snacking on the food, I washed the jars out and removed the labels.  Next, I filled the jars with faux moss rocks that I picked up at the dollar store last fall, as well.  Finally, while I planned to make my own mushrooms, I got lucky when Target offered felted wool mushroom ornaments.  I waited until they went on sale the day after Christmas and scooped up three of them.  They were $1.50 each.


They didn't have any red mushrooms left, however, so I used some felt and turned a blue mushroom into a red mushroom.  The white dots are just white felt.  I used little pieces of velcro on the bottoms of both the jars and the mushrooms to help them stand up, though they are a bit top heavy.


Finally, I modge podged a big letter 'H' that I picked up at Joann's with a 50% off coupon ($5) using our Sunday newspaper.

I love the look of this side of Charm's Room.  And actually, I am within eyesight of the finish line for Charm's Room.  More Charm's Room posts to come soon!!

Linking up to Finding Fabulous.
Linking up to The Shabby Nest.
Linking up to Thrifty Decor Chick.

Monday, February 20, 2012

My New Sewing Station

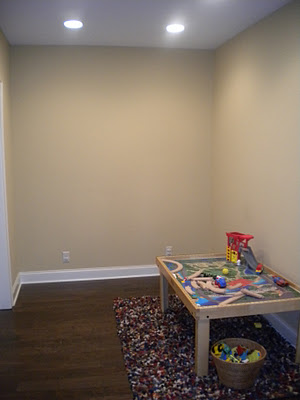
Back in October, I posted about our basement layout and plans we had for making the area a cozy and fun space for our kids.  While this area was originally going to turn into a play area/fort of sorts:


I decided that until we have time to tackle that project, I'm going to use the space as a temporary sewing station:

I used the rug I picked up for $32 on clearance from Target, an IKEA Expedit unit and a desk and chair we already had.  Easy Peasy.  


Now that the kids are a little older, they know to stay away from my sewing machine, so I can leave it out and easily accessible.  I've been sewing on a fairly regular basis as of late, completing two big projects in Charms room that I hope to get pictures taken of soon, so I can share with you how the space is currently looking.  

I just love having an area to dedicate completely to my sewing!!  Has anyone else created a crafting station recently?

Wednesday, December 21, 2011

Seeing Chevron

Way back in April, when I first posted about our dining room, I had mentioned wanting to add a touch of chevron in the form of either curtain panels or a large dining room suitable rug.  For now, I decided to go the chevron curtain route since we already owned a set of plain white Ritva panels from IKEA that would make the perfect blank canvas for a little chevron painting fun.

Here are our supplies:

I color matched a beautiful rich, deep chocolate brown paint color (I have since misplaced the paint chip so I'm not sure of the exact color...sorry!) to a flat 'One by Olympic' gallon of paint that we picked up on sale at Lowe's.  We also used textile medium in our paint (1:2 ratio of medium to paint) to make the paint more flexible when dry.  The curtain would be washable if I heat set the paint/textile medium combo with an iron, although I'm not sure I'd trust it in my washing machine:).  

In the future, I'd love to do a mini test to see how much impact the textile medium has on fabric flexibility and prevention of cracking, although the medium was not that expensive.  I used about 1 1/2 bottles of textile medium, and I stuck closely to the 1:2 ratio (medium to paint) recommended by the manufacturer.  Full price the bottles are $7.99 each at Joann's (located by the acrylic paints), but I used coupons on both bottles making the total for 2 bottles around $9.

When I first added the textile medium to the paint, I was worried that it would affect the color of my paint because the medium is a thick, white product, but my dark, brown paint color was not changed with the addition of textile medium.  I mixed the paint and medium together in a blue plastic cup:

We save our Red Solo cups for other things:).

And then I poured the paint into a paint tray within a cardboard box (to be safe since I was painting on the floor in our great room):


As for decisions on the size of the chevron stripes we wanted to make, I looked to this tutorial from the blog A Drop in the Bucket:


Shalynn used this spacing to create her bold chevron stripes (painted on a huge $20 drop cloth...brilliant!)


For our purposes, I decided that the 6 inch stripes would be a bit too thick for our space, so we decided on 4 inch stripes but kept the 12 inch spacing between peaks in place.  (In retrospect, I wish I would have drawn out our proposed spacing on a big piece of poster board so I could get the feeling of the stripe size.  I think I would have landed on an even smaller stripe size...like 3 inches or maybe even 2 inches.  Next time:).)

My amazing husband marked and taped out the curtain panels for me:

We just used the tape we had on hand, although it was much easier to paint when 2 pieces of 2" tape were placed side by side to create the four inch 'white' sections of the chevron pattern because there were no gaps, thus no opportunites for a roller to sneak over a tape line into the wrong section.

After taping, Bill needed a break so he laid down for a minute in Charm's room.  The kids created a colorful Daddy mountain while he rested his back and knees:

That's Bill under the pile of rugs, blankets, pillows and stuffed animals.


.,
His left hand is under this carefully placed pile of feathers.


The Daddy emerges...and a 30 minute feather pickup ensues.


And now back to the curtains.  Here is the second panel that was taped using 2 inch painter's tape:  


Painting it was super easy, since I didn't have to think about what parts needed to stay white versus being painted.  Any exposed part of the curtain got painted.


Here is the same curtain panel after I applied a second coat of paint:
I painted 3 or 4 stripes at a time and then removed the tape around those stripes to give me the best chance of having clean lines.  It worked well!!  Here are some more pictures:


And for a little fun, here's our dining room last year:


Add a basket wall, a chalkboard menu, wall art, a homemade curtain rod, a new dining bench (and table), new to us dining room chairs, a settee and now chevron curtains.  Then takeaway 2 booster seats, and here is our dining room now:


It's amazing what a difference a year makes!  Is anyone else chevron happy?  

Don't forget to enter my Christmas Starbucks Giftcard Giveaway if you haven't done so already...your odds are really good for this one:)!

Linking up to The Shabby Nest.

Home Stories A2Z

Linking up to Passionately Perfect.
Linking up to Thrifty Decor Chick.