This story could also be titled, "How to Make a Granny Couch', but it's less of a tutorial and more of a narrative. Here is the short version (that in retrospect I should have broke down into several posts..sorry!):
In May, I found this settee on Craigslist for $25:
It was located about 10 minutes from our house, so Bill went and scooped it up for me. It was in much worse shape than the images show. The fabric was torn and there were holes in the foam below the fabric. The legs had scratches galore. It was rough. I loved the frame of the piece, but I honestly had NO idea where it would go in our house. Settees are strange pieces of furniture in that they just aren't that comfortable. You can't easily lay down on a settee and take a nap. They are just formal and sort of stiff. I thought about it for awhile and decided that since we're booth people (we prefer booths over tables at restaurants), we'd enjoy a settee in our dining room. Here are some inspiration images:
I measured our settee and found that it would work well with our table, aside from being a little on the low side seat wise. Next up was the terrible paint and fabric decision. I had such a hard time with this decision. My number one goal in choosing a fabric was kid friendliness and durability. Although I would have preferred a lighter fabric to complement our dark table, I worried about stains ruining the settee immediately. I wanted the piece to be one that the kids could sit at to eat and be their messy selves. I was immediately drawn to indoor/outdoor fabric. I found
this fabric:

I loved it and still do (even after working with it for months and months!). I like that it was dark based and had a pattern. We felt like a floral pattern would help to hide our first timer upholstery mistakes well and also any stains should they occur. We were timid to try stripes or another geometric shape because we've never taken on such a project before and feared that lining things up appropriately may prove difficult. (In retrospect, we could have handled it, I think.) Also, most geometric fabrics have a light/white section that made me timid in the dining room of a household with kids. For some reason, I assumed that even light colored indoor/outdoor fabric would stain, but check this out:
Before:
ketchup and mayo piles
After:
Absolutely no residue at all. None. It just beaded up in parts and wiped away easily.
This was leftover fabric from our patio chair cushions. I discovered this highly stainfree characteristic after we already had the seat upholstered on our settee, and I was feeling a little like I was on floral overload. I had a mini panic attack at this time. All this time spent and I wasn't sold on the fabric!! I kept thinking the number one design rule is keep fabrics on big pieces neutral! Goo. We pressed on, however, because the fabric was bought and we had already invested so much time hunting down the fabric and upholstering the piece already. Also, I knew that a good chunk of the settee would be covered by the table, so there would be less floral action exposed on a daily basis.
Here are some photos of the process:
Leaving our mark on the frame:).
(Sadly, I have no pictures of adding the foam and fabric to the arms, adding the nail head trim or trimming the fabric (scariest part) because those pictures disappeared in the
great photo card tragedy of 2011.)
There is no way I could write a tutorial on this project, because from start to finish, this project lasted about 4 months. It actually lasted six months if you could the two months that the settee sat untouched in the garage. And also, I couldn't write a tutorial, because we winged the entire project. We didn't look into any upholstery 'how to' books or read any blogs about upholstery work. We just took a ton of pictures as we were taking the settee apart initially and then used the old fabric as a guide to cut the new fabric. In general, here were the steps we took:
Take 1 million pictures of the piece.
Remove old nail head trim. Thankfully, the previous trim used was a trim kit with nailheads every fifth hole. If it hadn't been this product, I think we would have given up before really starting the project. Removing individual nail heads on a piece this big would take forever! As it was, it took about 20 minutes.
Remove old fabric. This is an intense process. Just when you think you're almost done, there's another layer. This step took a long time. We'd work on it an hour every night after the kids were in bed for about 8 sessions over a 3-4 week period.
Take lots more pictures and remove old foam and shove the foam in bags with labels. This took about 1-2 more one hour sessions.
Prime and paint the settee. I used Kilz primer and 3 coats of Satin Dutch Boy Refresh Paint in Moss Point Green. When the frame was primed, I definitely had second thoughts about keeping it white. It was gorgeous. The green suits the fabric much, much better though!
Take the settee inside and get the foam seat piece back in place. We did some foam flipping to cover up old holes. This took about one hour session.
Iron and cut the fabric. Be insanely careful to line up the fabric appropriately before you cut it. This took several hours (probably 3 for all pieces).
Staple the fabric on the settee seat. We used staples sparingly to start and then in step 12 went back and really secured things once we were sure we wouldn't have to redo any sections.
Put the settee back foam piece in place and staple the fabric seat back onto the settee.
Put the foam and fabric on the arms of the settee.
Put the foam and fabric on the very back of the settee.
Put in lots of staples to secure everything really well now that it is all in place well. Let settee sit for about 6 weeks unfinished in your front room while you focus on things like major landscaping work and major paint projects
Hold your breath and trim the fabric just past your staple line using a utility knife.
Tap in nail heads using a kit because individual nail heads would take an insane amount of time to install. Here is my fair warning on nail head trim kits: THEY ARE SHARP. BE CAREFUL!! While we didn't spill tears over the re-upholstery process, we did shed blood. Both of us on several occasions (not just working with the trim kit, but with pliers too) scratched, poked and scraped ourselves. Bill took a pliers to the hand. I took a pliers to the nose while trying to remove staples. I cut myself with the nail head trim while it was still in the package...right before our landscaping project:(.
Turn the settee over and staple some of that cheapo black fabric stuff to cover up all the settee innards.
Finally, Finally, Finally. Do any touch up wood filling or paint to the frame. We had a few errant staples that went too high and one gouge from a staple that was angled too much. Also, the nail trim itself scraped up my paint job a bit too. Did I mention that stuff is sharp? Also, trim away any fabric that passed the nail head trim line as best you can. We used a very tiny scissors to do this.
Stand back and admire your granny couch!
I love this settee. Not because it's finished perfectly (it's not!) and not because it has a super cool, timeless look (it doesn't), but because Bill and I conquered it together! We learned so much about staple guns and nail head trim and fabric in the process. And we learned other things, like how we are never, ever, ever going to take on such a big upholstery project again:). Mostly, however, we learned that together we can do anything!!
Here she is in our dining room:
The kids love it, and it has definitely fulfilled our number one objective: kid friendly dining room seating! They immediately began playing restaurant without prompting once they saw it in place. It definitely is a unique piece that adds some depth to our dining space. The floral Pier 1 chair/s from this image had to go, obviously:
They are living in our office right now. Since they are slipcovered, I plan to make some neutral slipcovers for them so we can use them in the dining room in the future. The dining room is starting to really come together.
Here is a picture of our dining room from about a year ago:
And here it is today:
I made a few fall changes that I alluded to in
this post:
I moved my blue lamp from the great room to our buffet, and I moved over the gold frames from our great room as well.
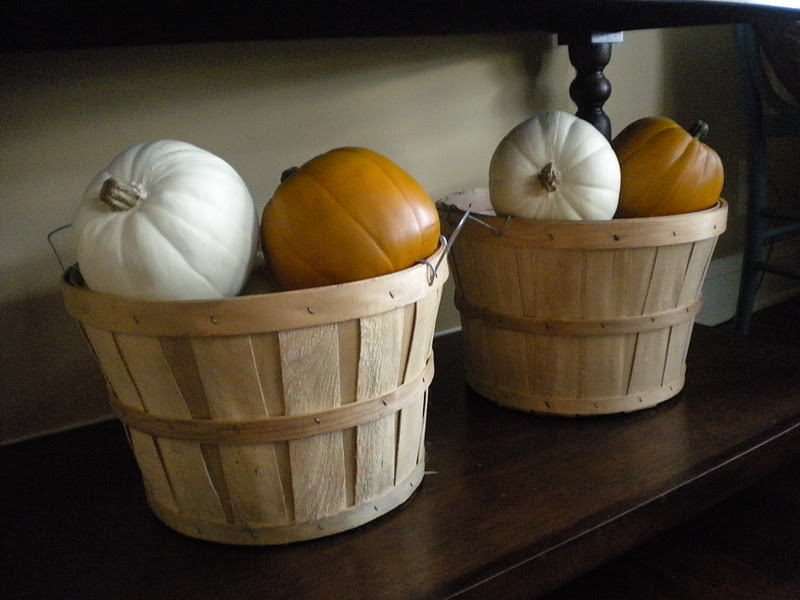
On the bottom shelf of the buffet, I added a couple harvest baskets that I picked up from Pier 1 for $2 each (they were the old display baskets for the store) and filled them with some of my faux pumpkins.
I still have a couple more tweaks to make in the space, and then hopefully, I can call this room 'done' for awhile.
Settee Cost Breakdown:
Craigslist Settee $25
7 yards of Fabric from Joann's $80
French Natural Nailhead Trim Kit: $40 with shipping from
Perfect Fit because Joann's was out of stock for the month leading up to the time we needed it (I still have at least half of one roll left for future projects)
Cheapo Black Fabric for bottom of settee: $6 with Joann's coupon
TOTAL: $151 + OUR TIME
= 1 INCREDIBLY PRICELESS SETTEE