Friday, October 12, 2012

Anchor Applique Pillow

I'm not even sure if 'applique' is the correct term to describe what I did to this pillow, but it is in my head so I'm going with it.  I decided I wanted to make an anchor pillow for Charm.  I originally planned to hand stitch an anchor onto a pillow using felt like I did with my Pottery Barn Teen look alike letter pillows, but I decided to try using some of the iron on adhesive that I had leftover from the pirate eye patches that I made for Charm's Pirate Party to make an anchor applique.

The process I used was very simple.  I made an envelope pillow cover with white piping using fabric and a pillow form we had on hand already:


Next I made an anchor template by folding a piece of paper in half to make a symmetric anchor shape:  


I double checked to make sure the scale was appropriate to my pillow:


I raided my fabric stash for a few anchor color options, then I cut out small pieces and ironed the Hem 2 Hem on the back of the fabric, and stenciled the anchor with a pencil onto the fabric:


I cut out the anchors and let Charm pick out which one he liked best:

Green Velour


Red stripes

Multicolored


Charm chose the simple green option.  I used tape to keep the applique in place on the pillow and then ironed the center of the applique (avoiding the area with tape on it) with a thin towel placed between the anchor and the iron.  I removed the tape once the center of the applique was well adhered to the pillow fabric.


Final product:

I love that I could use regular fabric without fear of frayed edges!


I have one more update to post, and it has something to do with this whole 'mattress on the floor' situation that was going on for a while after we switched Charm from a toddler bed to a twin sized mattress:


Have a wonderful weekend!!

Thursday, October 11, 2012

Hand Painted Canvas Treasure Map and Play Like a Pirate Art

(So...I guess this week is all about 'gallery walls' around here:))...When I decided Charm's Room needed more of a 'pirate' feel, I decided to switch out a couple of the frames from his gallery wall:


Specifically, these two 't-shirt' art frames (and then one more just for fun:)):


For one of the frames, I decided that a treasure map would be appropriate.  I already had leftover duck cloth that we used for Charm's pirate party treasure maps that could serve as a canvas, so I cut a piece to size and then found this map online:


I used this map for total inspiration since I'm good at recreating images, but not coming up with them on my own...maybe someday I'll have the ability to be more original:)!

Here was the process:

Step 1: Pencil sketch the image on the cloth:


2. Choose your colors and start painting!  (Helpful hint:  Choose coordinating colors to those in the room where the image will be displayed.  Don't just pick them from memory or because they are similar to the colors of the image you are recreating!  I would have used different shades of blue and green had I taken the two minutes to run upstairs and look at the room again.  Ah well...lesson learned!)


3. When you're done painting, add an optional secret message that will get hidden by the frame or on the back of the canvas:


4.  Frame your work (or hand it to your kiddo for play time):


5.  Stand back and look at your handiwork and try not to get distracted too much if you're paint colors aren't spot on:).

Total cost: FREE since I already had the duck cloth and paint on hand!


With the other frame, I decided I wanted to capture a fun saying or quotation.  I LOVED this one:

via Monorail on Etsy

...but the orientation was wrong for the frame I needed to fill.  

They have t-shirts with the saying on it:

...but instead of doing more 't-shirt' art, we created a similar look using Powerpoint on photo paper:


We printed it in the size we needed for about $3.


And here it is on the wall:


And then I decided to change out the green 'fretwork' frame to this image:

I took this picture of Charm staring at the ocean on our trip to Florida last winter.  I just love it!!  I stare at it and wonder what was going through his mind in that moment.  Perhaps he was pondering how far away the pirates might be:)!!

Now his gallery wall looks like this:


 These new chairs were purchased online from Target for about $13 each on clearance with a coupon:)!

I just have a couple more updates for his room...one small one and one big one...more to come soon!

Linking up to Finding Fabulous.

Tuesday, October 9, 2012

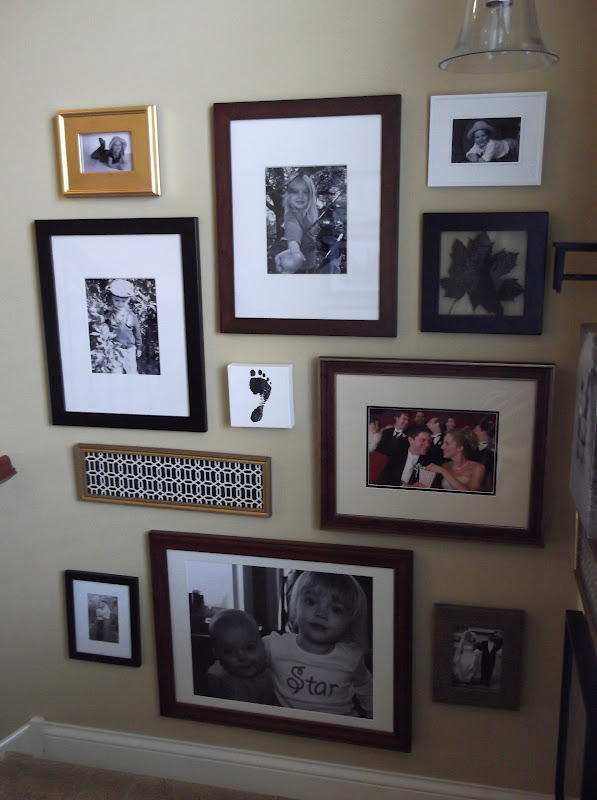
Our Stairwell Picture Frames Have Pictures Now!

Several months ago, I posted about our stairwell's new gallery style frame arrangement:


Many of the frames had no pictures in them or the pictures were sideways.  Hosting Charm's party in August gave me the motivation to make changes to the majority of the frames, but my four white oval frames were still blank.

I finally filled them last week with some simple profile pictures of our family:


We all just love them!  I made them with black card stock and some 'newspaper' wrapping paper that I found recently in the $1 bins at Target for the background. (They had a faux bois wrapping paper too!)


Check off another little 'to do' that's been on our list for awhile!  Yes!

Linking up to Finding Fabulous.

Friday, October 5, 2012

The Hello Goodbye Series: Indoor Fresh Air

Recently, I came across this post by Cassie at Hi Sugarplum and this post by Sarah at Thrifty Decor Chick regarding house plants and planters.  I realized soon after reading them, that our house had exactly ZERO house plants!  We used to have house plants, but then we moved and somehow the plants were left in our sun porch and they didn't survive the first winter out there.  They never got replaced.

It quickly became important to me to reintroduce some plants into our home.  Hopefully, some hardy plants that we can keep looking nicely without much maintenance.  My original plan was to start with a couple plants.  I picked up this beauty at Home Depot (with a one year guarantee:)) for $31.50 with a coupon:


It's amazing how much color and richness it adds to the space.  Here is a before picture for reference:


I also purchased this aloe plant at Home Depot for $9 with a coupon.  I remember having an aloe plant in our house growing up, and it has medicinal benefits as well.

I think the paint color in our bathroom should be called brown clay pot.

I was planning on being done with plant purchases for awhile so we could see how we did with these two plants, but then I ended up making a run to Walmart the same day for a planter for the aloe, and I noticed that all house plants were on clearance for 50% off.  I ended up buying a mini forest in one day!  I got this ficus for $6:


And this guy for $6:


I even bought a little bonsai for Lucky's room for $7:

I have to get that tag out.  It feels like it's cemented in the 'soil'.


And then I couldn't pass up a couple $6 orchids:


Gorgeous no?  I've been walking past the orchids at Trader Joe's for months now.  They all call my name and say...take me home, take me home!  Now, I've got some orchid babies of my own:)!

I'm just loving all the greenery, and I especially love knowing that our air is cleaner with our oxygen producing plant friends in the house.  I still have a few succulents on my 'wish list' and maybe a tall money tree or two for our front room and master bedroom, but for now, we have a wonderful start for $70 total.  Not too shabby!

Hello fresh air from our new plants, goodbye to our plant-less house!  Has anyone else been filling their home with plants lately?  Any suggestions for hardy, low maintenance house plants?

Wednesday, October 3, 2012

Homegrown Herbs for the Winter

We recently harvested lots of fresh herbs from our garden and washed, cut and dried them for use this winter.  

This is rosemary washed and waiting to be cut:


I picked up these 5 bladed herb scissors at a local art fair a couple weekends ago.  They work really, really nicely!


I also bought some of these bottles from Specialty Bottle Company (Along with several bug spray bottles for the homemade bug spray that we made and used this summer....perhaps I'll write about it next summer:)!)  I chose this bottle size because it most closely matched the herb bottles that we purchased earlier this year.  I also used some labels from Staples that I had picked up with a coupon earlier this summer.


I think these could make a wonderful Christmas present or teacher's gift on the cheap!!


Monday, October 1, 2012

Pirate Rope Mirror

I hope you all had a wonderful weekend!!  Ours was full of family adventures with a trip to a local 'big truck' show for the kiddos, a visit to a fun castle playground and a dinner at the beach.  Now that the weekend is over, it's back to the daily grind with work, school and Mom taxi services to all of the activities we signed up for this fall.  The time continues to fly by...I can't believe it's October already.  According to Lucky, October is the best month ever, which means her birthday is approaching in the next few weeks:).

Happy October to you!  


Here's a little project I worked on a couple weeks ago:

It's a nautical rope mirror for Charm's Room, which adds to a few other pirate items that were already in his room!

I made it using a Nate Berkus tutorial from The Nate Show and these items:

A 16" diameter mirror from Joann's, a 18" cardboard like wreath form from Michael's, some rope from Lowe's and some twine I had on hand (not pictured).  The total cost for the materials (using coupons) was under $15.  You could also just add rope to a mirror you already own or a Goodwill mirror would work too:)!  Also, in Nate's tutorial, they used a simple piece of cardboard cut in a circular shape instead of the wreath form, but I didn't have a piece of cardboard the right size needed and even if I did, I didn't want to have to pull out a huge compass or plate or round object/s to make the circle shapes and then cut them out.  The wreath form seemed sturdier and easier, and was worth the $3 or so that it cost.


This project required lots of hot glue and a little patience.  I added rope to the sides of the mirror for a more finished look.  The top loop on the mirror was created by simply making a loop with the rope and gluing it down.  The end pieces were covered by wrapped twine, and then the mirror was hot glued to the back.  

Here are some finished pictures of the mirror hanging in Charm's closet:


I love it!  The quality of the mirror given the inexpensive starting materials is quite impressive in person, in my opinion.  If I ever start selling my work, this would be an item I'd offer and be proud to sell:)!

Linking up to Finding Fabulous.