I thought really hard about ordering this one again:
Pottery Barn Kids
But by the time I got ready to pull the trigger, it was out of stock. Two years in a row. I decided to brainstorm a bit about what I wanted in a countdown. I decided that I wanted something simple that we could reuse every year without much effort. I decided I didn't want anything that had pockets that had to be filled with cheap gifts or sweets every year (which ruled the Telluride Calendar out anyway!). I searched around the internet and stumbled on the blog called Oh Happy Day! There are so many great countdown ideas on this site!
Check out this one:
Oh Happy Day!
And this one:
Oh Happy Day
And this one:
Oh Happy Day!
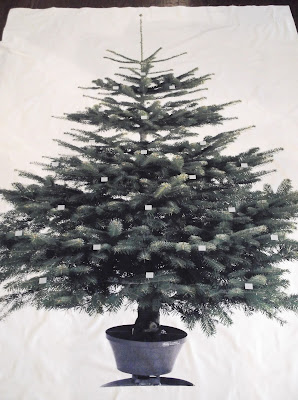
I was particularly inspired by the last calendar, especially because I had seen the tree fabric at IKEA recently, and I wished I had a use for it because it was so awesome! I would need to tweak the plan a bit because it had numbered pockets, and I didn't want pockets, but I decided to go for it! Here is our end result:
The pictures don't do it justice, mostly because it's located in an area that gets no natural light, but also because it's at the bottom of our staircase which makes getting pictures a little tricky. I do love that it's the first thing you see upon walking downstairs though!
And now for some details. I picked up the fabric on sale at IKEA for $4.99/yard, and I needed 2 yards. I ironed the fabric and then attached twenty-four iron on velcro strips to the tree fabric.
Next, Bill picked up four furring strips for 75 cents each and built a 73" x 55" frame for me. (It is huge!) We needed to put L brackets in the corners of the frame to keep it somewhat square because the furring strips we used had some serious curves in them (and we picked the best four in the entire pile!!)
We stapled the tree fabric to the frame (it only took two tries to get it lined up right...be forewarned, this tree is not vertical on the fabric...you'll never get the base and top perfectly centered:)). And we adhered the big ol' tree to a wall in our basement using Command Strips. We really didn't have much going on in our basement in terms of holiday decor, so I love that this added some festive flair to a space we are in several hours a day!
I numbered brown lunch bags and added a little ribbon and placed an ornament in each one. Some ornaments are felt, some are wood. (The felt ornaments stuck to the 'hard' side of the velcro that was attached to the tree, and I put a little adhesive piece of 'soft' velcro on the wood ornaments so they would stick to the velcro tabs on the tree too.) Lucky, Charm and I painted the wood ornaments (which were 29 cents each from Joann's). The felt ones were 70 cents each from Michael's on sale. I let the kids open up 10 bags in one day to get us caught up.
Here are some pictures from our big ornament opening:
If you include the cost of the fabric, velcro, ornaments, furring strips and L-brackets, the project cost about $30. Now I have to figure out how to store it:)...perhaps I should have used dowels instead!


Super cute! I have a big pocket advent calendar I love from Garnet Hill, but it forces me to take the cheap (crap) gift route. :(. The boys LOVE it though. The first thing they want to do is check the calendar to see what the elf brought. Your tree is making me think though..... :)
ReplyDeleteThat is very cute. You always come up with such creative ideas.
ReplyDelete